Within this project, we were given the opportunity to choose what topic
we wanted to explore further. The topics available for selection were contact sheets, challenging traditional representations, aspects of landscapes, unusual portraiture, viewpoint and composition, multiple images, documenting in colour and new realities. The first thing I did within this project was choose three topics from the selection and create individual mind maps for them all. The mind maps (posts on blog) included information about famous photographers within that specific area i.e William Klein was a famous photographer for the topic 'contact sheets'. The three topics I choose were documenting in colour, unusual portraiture and contact sheets. After researching the three topics, I then had to choose one of the three. I decided to choose 'unusual portraiture' because I thought that it was most similar to my previous 'Mark Jenkins' project that I completed for my unit three photography. I therefore had prior experience with completing shoots that were not typical or common. I had created shoots that were interesting and unique as well as being different. Something that helped within the 'unusual portraiture' unit four project.
Within the researching stages, I had to create a definition page which featured a dictionary definition, describing words, four annotated photographs and my own definition of 'unusual portraiture'. This was created in order for me to start to understand what unusual portraiture meant and what is featured as well as thinking about my own definition of the topic. This was important because it allowed for the to understand and clear up anything that may've been confusing to myself about the topic. As well as creating a definition page, I also had to create a discussion. The discussion featured potential ideas that I had planned to use within my shoots. Areas that were included within my discussion were controversial make/up, paint and conventions of existing famous portrait photographers. The discussion was also important because it allowed for me to start to think about the sort of things that I wanted within my shoots. This helped me a lot as it ensured that I already knew what sort of things I wanted to include and the path I wanted to go down.
I also had to create an image bank which featured a number of images that related to the topic 'unusual portraiture'. The images were then annotated and deconstructed in order to look for any photographic elements/techniques that have been used. Annotating existing photographs was informative to myself because it allowed for me to see the different elements/factors. It also helped because it encouraged me to think of new ideas and gave me inspiration for upcoming shoots. The image topics/subjects were varied and I was therefore encouraged to think of a lot broader and more unique/interesting ideas. This was a massive help and allowed me to be more skillful.
I then had to create a research log that I filled up with different existing portrait photographers. I decided to ensure that I had 21 different photographers so that my work would be more varied and it would give me the opportunity to look in greater detail at some of the options that I could pursue. For each photographer, I had to find a photograph from their collection, write a little bit about them and feature the link in which I found the photograph. From the 21 photographers available to me, I then choose five which I felt were most like the type of photography/subjects I wanted to look into. For each photographer that I choose, I had to write a paragraph to give more information about the photographer followed by an explanation as to why I choose that photographer. After competing that, I then had to find four photographs from that specific photographer and evaluate them in terms of positioning, colour, imagery etc. After evaluating the four photographs, I then had to write a small paragraph to sum up the photographer's work. Following that small paragraph, I then had to write another small paragraph and briefly speak about how they influenced me to want to incorporate their style of work into my mine. This was created for all five photographers and gave great detail about their work.
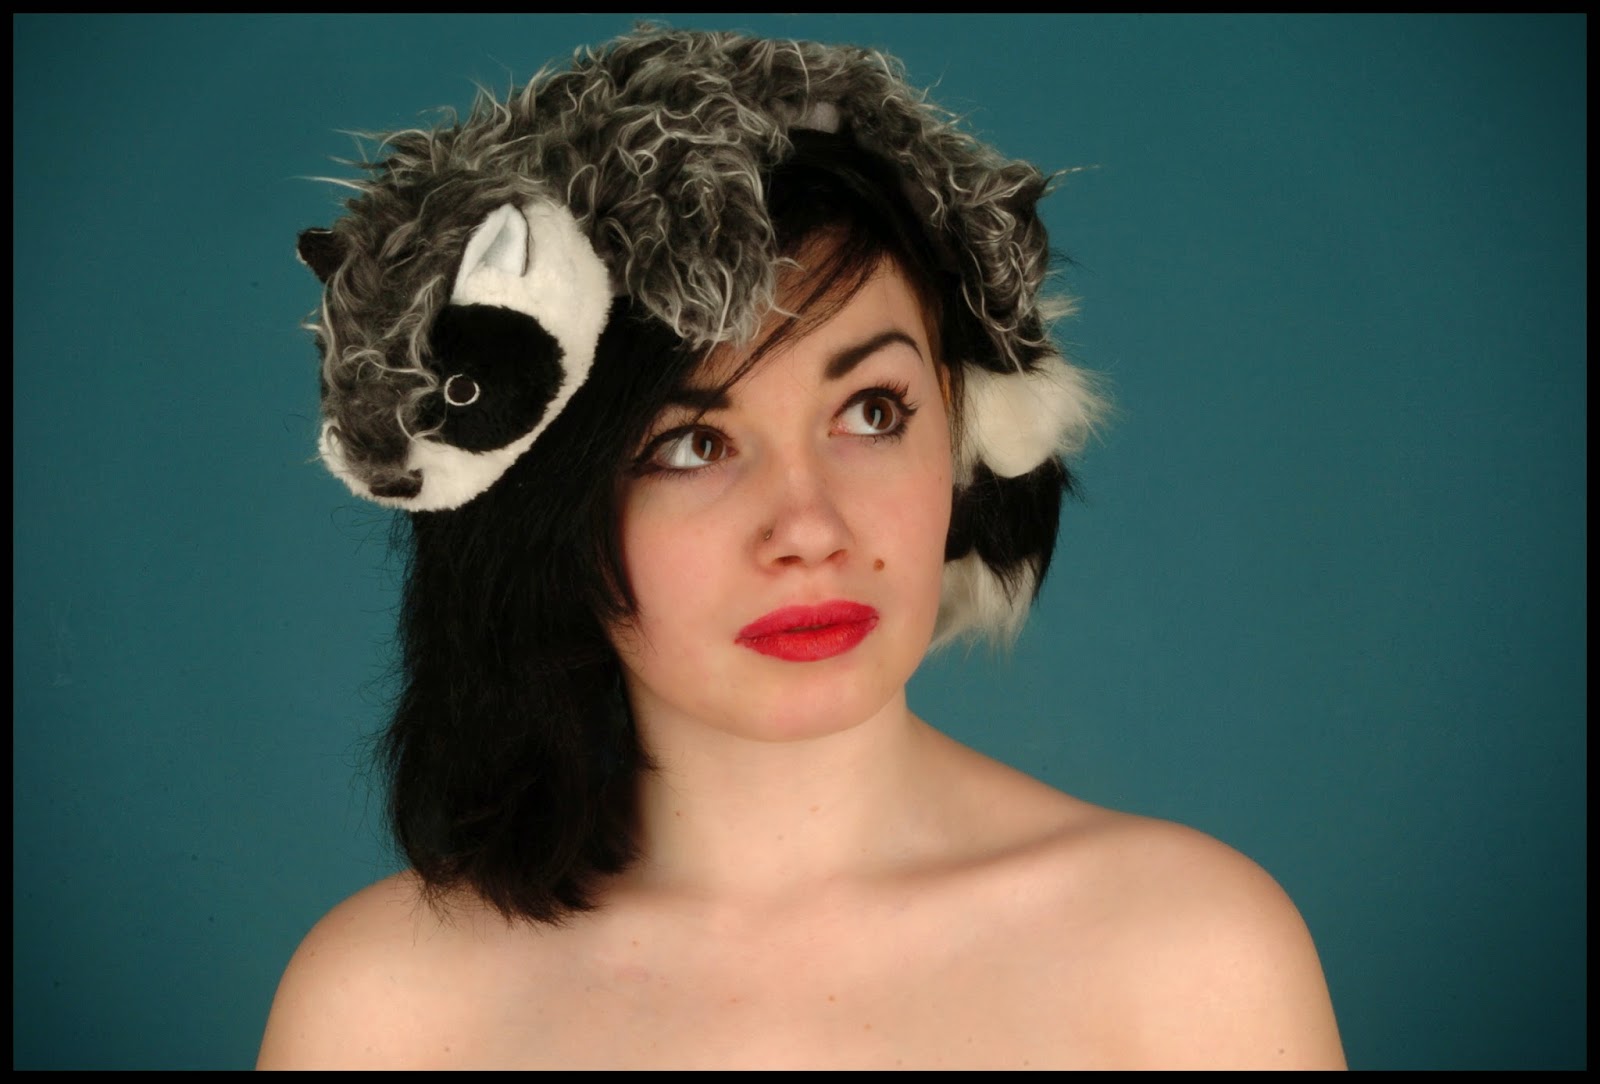
The next thing on my list that I started was the personal shoots. For my first shoot, I used models from my class and placed them on a chair in the studio. They were asked to blow bubblegum bubbles in order to create a different effect. I thought this would be a good idea because it was different. The second shoot featured a model who completed different poses/body positions. I then went into London at night and shot pieces of scenery. I placed the London shots onto body parts of the model using Photoshop - this was inspired by Caesar Lima. For the third shoot, I based my work on Yago Partal. I completed two separate mini shoots - one was of animals in a zoo and the other one was with a model in the studio. I then placed the animal heads on the bodies of the model. For the fourth shoot, I decided to photograph my model in the studio. I had seen a photograph on the web 2.0 that showed a woman wearing a squid on her head. I thought that was a good idea and therefore tried to do the same but instead used dog toys to ensure that it wasn't difficult or disgusting when shooting. I placed the model in front of a green/blue background to make her hair and skin stand out well. I think that this shoot was quite successful because it captured what I wanted to do.
For the fifth shoot, I placed make-up on a male. I decided to do this shoot because it was unusual to see - the fact that a man is wearing female make-up products (lipstick, mascara, eyeliner, etc). I think that this reflected unusual portraiture because it was is stereotypical of men to wear make-up. For my sixth shoot, I took inspiration from Caesar Lima again. This time I took inspiration from a photograph which featured a woman who had lines around her face. I decided to do this because it was different. I think that this shoot worked really well and was successful in terms of capturing the aim of the shoot. For my seventh shoot, I used the same model to capture her face and shoulders. I then used Photoshop to place different types of make-up on her. These was the least productive and successful shoot and therefore I decided to not continue down the make-up road. For my eighth shoot, I took inspiration from Alexander Khokhlov. For this shoot, I dripped different coloured face paint on her face and allowed for it to set. This shoot was really interesting and successful because the photographs looked good. For the ninth shoot, I took inspiration from Alexander again. This time I used black and white squares on her face. This shoot was similar to the previous shoot and was successful because I had prior experience with face paint. For the tenth and final shoot, I took inspiration from the Slow Mo Guys and created a video which featured water being thrown over my model. This was the most fun shoot to do and resulted in really good still images, animations and video. The ten shoots that I did all related to the project because they were unusual and different to normal portraiture.
During the project, I also had to create a number of different computer and physical experiments. I had to create a ten computer experiments using Photoshop and eight physical experiments using the photographs that I had taken during the shoots. These were interesting to complete and quite challenging due to the fact that I wanted to do something that was different - because it would've fit well into my project and also something that was unusual for most people. It was therefore slighter harder to think of ideas, especially due to the fact that I didn't want to repeat any experiments that I had done the previous project. Alongside computer and physical experiments, I had to create a variety of print techniques. These print techniques were black and white, duotone, repetition, selective colour, photo joiner, soft focus, cluster, weaving, multiple imagery, image within image, image and text, overlay, montage and also framing. I had completed these previously within the projects during AS and A2 and therefore knew what I had to do in order to be successful.
While completing the project, I had to do a 15 exam based on my topic. I decided to base my exam on a photographer called Jenni Tapanila. During my first shoot, I used fake blood and black lipstick/props in which the photographs were focused on the mouth area. In the second shoot, I used a model who wore a prom dress covered in blood, alongside a tiara and sash. For the third shoot, I placed my model in a bath full of milk and some flowers. For the fourth and final shoot, I completed a self-portrait using lamb's hearts and pig's kidneys. I think that my exam was a success because I captured horror and created work that was similar to Jenni Tapanila. The shoots were different and not stereotypical portrait photographs because of the horror element.
Overall, I think that this project has been quite successful in terms of relating the shoots to the aim. I had tried to ensure that all the shoots were similar to existing unusual portraiture photography so that I completed what I intended to do.


 This was one of my favourite animations from this shoot. I decided to create an animation because I thought it would look to capture the water as it was tipped over her head. I had to take multiple photographs during the shoot and then put them together on Photoshop. I had came up with the idea after I asked her to pour it over her head for a video. Doing an animation instead allowed for my work to be more interesting and varied rather than just videos and still images. In terms of this animation, I made the model pour water on top of her head using both hands to do so. In terms of editing, I individually edited the levels and curves of each photograph and then used the frame timeline to place them together and create an animation. I think that this animation works really well because all the shots follow one each other well and the timing of the time in between the shots works and makes it look like a video. I think that have this animation repeat itself makes it look god because it shows the model continually throwing water on herself. If I were to re-do this, I would try to get more still shots so that the animation could go on for longer.
  This photograph was my least favourite still image from the shoot as I had attempted to throw water onto the model and capture it within the shot. As I threw the water on the model, I tried to click the button. Unfortunately, because I was having to complete two tasks at once, I wasn't able to capture the water in time and therefore only got a shot of the model standing still after the water was thrown on her. The photograph did not come out how I had originally planned/wanted it too and so it wasn't my favourite. I think that if I were to re-do this still image, I would take 2/3 photographs straight after one another (similar to an animation) and then choose the correct and most efficient photograph from the lot. Because this photograph wasn't worth the effort of editing, I decided not to edit it and focus on another photograph.
  The inspiration behind this shoot comes from the famous photographer Alexander Khokhlov. He is the photographer that I decided to concentrate on in the previous shoot and I thought it would be a good idea to expand on his work. I had seen a shot of a woman whose face was painted in black and white. I thought that it would be interesting to create a pattern with the black and white paint on my model. For the shoot. I used black and white to put four squares on her face. I decided to put the same colours opposite one another so that it would create a diagonal effect. This was done because I thought it would look quite interesting and really different. I then photographed her in and around trees and on a field. I thought that these locations would be good because of the contrast in colours with the face paint. I think that this photo shoot was something interesting and it was fun to do - similar to the previous one. The use of trees in the background and foreground within some of the shots worked really well and I am happy with the outcome of the majority of the photographs within this shoot.
 This photograph was one of my favourites from my shoot. I think that it is one of my favourites because it worked really well in terms of colour contrast. I think the black and white had a high contrast against the green leaves and bright orange top. The colours immediately catch your eye and grab your attention. The face paint is then the object/item that keeps the audience's attention on the photograph. This is one of the reasons why I like this photograph. I think that having the tree branch/leaves in front of the photograph works really well because it uses foreground blurring to ensure that the model is in focus and doesn't look blurry. In terms of editing, I decided to adjust the levels and curves within this photograph to make sure that the lighting looked quite good. I also used the paint brush tool in both black and white and went over the face area to ensure that the lines were as straight as possible and that the face didn't look too unprofessional. I think that if I were to re-do this photograph, I would try to get the model to look at the camera and see exactly what that makes the appearance of the photograph look like.
  This photograph was one of my least favourites from the shoot. This is due to the fact that the model is looking at the camera with a silly look on her face and is therefore not being serious about the shoot. The photograph is also not my favourite because of the blurring of the leaves at the far bottom of the photograph. It makes the audience distracted and therefore their attention is not put on her face. I think that the positioning of the trees in the left hand third of the photograph works really well and looks good alongside the leaves at the top and right thirds of the shot. In terms of editing, I tried to crop out the leaves within the bottom of the shot but it did not look well (based on proportion) and therefore I decided to leave this photograph. If I were to re-do this photograph, I would ensure that the leaves within the bottom third of the shot were in focus - or not within the shot at all. I would also wait until my model was ready to shoot so that her facial expression would be more professional and work well within the photograph.


